Clearwater

Internal Gutters (Box Gutters) Explained – And Why Converting to External Spouting Is a Smart Upgrade

If you own a home with internal (also known as concealed gutters or box gutters) gutters, you probably enjoy the clean roofline. The trade‑off is that problems are harder to see and often costlier to fix. This guide explains how internal gutters work, why they commonly fail, and why so many New Zealand homeowners ask Clearwater Spouting to convert box gutters to modern external spouting and downpipes

What are internal gutters?

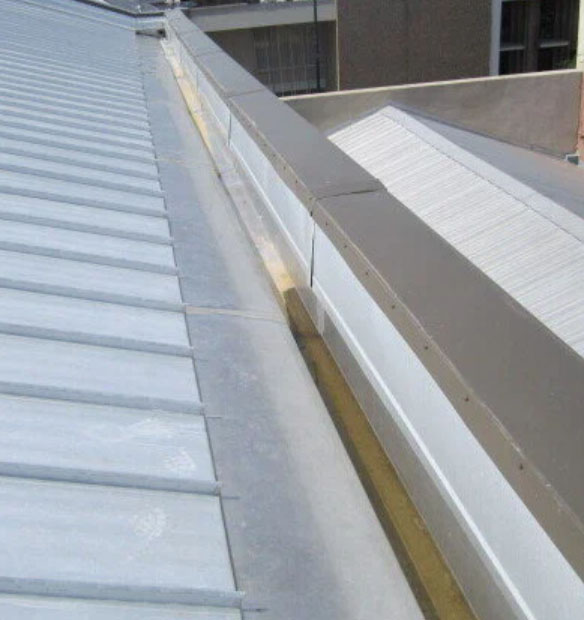
Internal gutters sit within the roof structure, hidden behind parapets or within wide eaves. Water is captured in a trough formed by roofing or membrane and then directed to internal outlets and downpipes. The tidy look is appealing, especially on older villas and homes with parapets, but the arrangement puts water inside the building envelope – so any failure is immediately higher risk.

Water pooling inside internal gutter

Why internal gutters fail more often.

Hidden leaks stay hidden: When a joint opens up or sealant ages, water can run into roof cavities long before anyone sees a stain on a ceiling.

More components, more risk: Internal gutters rely on membranes or linings, sumps, outlets, overflow devices and concealed pipework working together. One blocked outlet can put the whole run under water.

Difficult to maintain: Access is often limited and safe cleaning may require specialist gear. Small issues can escalate before they are found.

Heavy rainfall exposes the weak points: Short, intense downpours quickly exceed the capacity of older box gutters or downpipes.

The code context in NZ

New Zealand’s Building Code requires buildings to manage external moisture effectively, and the Acceptable Solution E2/AS1 sets out detailing for gutters, outlets and overflows. In practice, internal gutters must be accurately sized, laid to a minimum fall, and critically include overflow paths that discharge safely to the exterior so you get early warning if an outlet blocks. Industry guidance reinforces that membrane internal gutters require dedicated overflow outlets sized at least equal to the downpipes they serve.

Top risks to watch for with internal gutters

Overflow into the building: When outlets block, water has nowhere to go but over the inner edge toward ceilings and wall cavities.

Membrane lifespan: UV, heat and standing water shorten the life of lining materials supporting the gutter trough.

Hidden structural damage: Prolonged damp weakens timber and encourages mould, even if ceilings look fine.

Downpipe bottlenecks: Concealed twin bends or undersized pipes restrict flow from sumps, causing back‑up during storms.

Limited visual clues: Because everything is concealed, the first “sign” is often staining, blistered paint or a musty smell indoors meaning damage has already occurred.

How an internal‑to‑external conversion works

Every home is different, but a typical Clearwater Spouting conversion includes:

Assessment and design: We inspect the current box gutter layout, sumps, outlets and downpipes. Then we measure roof catchments and specify external gutter profiles, rainheads and downpipe sizes to suit.

Make‑safe and isolate: Temporary protection may be installed while the internal gutter is decommissioned to keep the home dry during change‑over.

Remove or line‑out the internal gutter: Depending on the construction, we remove the internal trough or line it out to provide back‑up protection.

Install fascia, brackets and external spouting: New fascia sets the line and fall, continuous spouting is roll‑formed on‑site where practical for smooth, leak‑resistant runs.

Fit rainheads and downpipes: Rainheads provide capacity and a visible overflow point, and downpipes are sized and routed to discharge clear of the building and landscaping.

Final detailing and tidy‑up: Joints are sealed, outlets tested, and we walk you through maintenance tips and before/after photos.

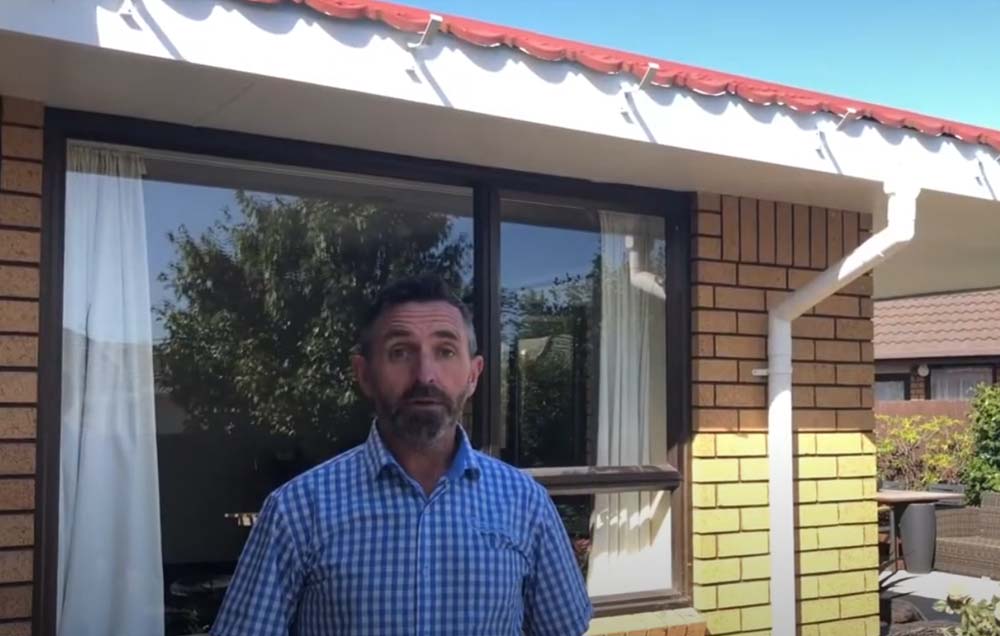
Watch: Internal gutter conversion Explained

Below is a short video that shows what an internal‑to‑external conversion looks like on a real home.

Frequently asked questions

How long does a conversion take? 

Most residential jobs are completed within days rather than weeks, subject to weather and access. We will confirm the schedule when we quote the job.

Can you match my existing colours and profile? 

Yes, NZ‑standard colour ranges and multiple profiles are available to complement most roofs and fascias.

Do you replace rotten fascia?

If we find deterioration behind the old gutter, we can replace or repair the affected fascia before the new spouting goes on.

What about guard systems? 

Where trees are close, we can install leaf guards or rainhead screens that suit your profile and local conditions.

Is conversion always the best answer? 

Well most of the time it is – however on some homes, careful remediation and / or additional overflow may be sufficient. We will give you options and costs so you can decide with confidence.

Clear, simple pricing and a strong warranty

Our quotes spell out what’s included, profiles, colours, rainheads, downpipe locations, and any fascia work so there are no surprises. We install to best practice and provide workmanship and product warranties for peace of mind.

Ready to reduce your risk?

If you’ve seen interior stains, or any related issues talk to Clearwater Spouting. We will inspect your home, recommend the smartest path forward, and deliver a tidy, long‑lasting spouting. Call 0800 724 662 To Book your free on‑site assessment and quote today.

Gutter Repair Checklist: 12 Clear Signs Your Gutters Need Attention (NZ Homeowners’ Guide)

If your gutters aren’t doing their job, water finds a way into places it shouldn’t, either under the roof, behind the cladding, and around the foundations. Left unchecked, a small gutter issue becomes a big, expensive leak. Use this practical, homeowner‑friendly checklist to spot problems early and decide when to bring in Clearwater Spouting for a professional fix or full replacement.

Gutter repair checklist

Why this matters in New Zealand

Our homes face frequent heavy downpours and wind‑driven rain. The New Zealand Building Code (clause E2 – External Moisture) exists for a reason. Your roof, spouting and downpipes must move water away before it can cause damp, rot or mould. Good gutters are part of that weathertight “system,” not an afterthought.

How to use this checklist

Walk the perimeter of your home after a rain event and again on a dry day. Look up from ground level with a torch. If it’s safe, view the roof edge from a ladder; if not, take photos from the ground or a window. Note anything that looks out of line, damp, stained or rusty. If in doubt, document issues and call a qualified spouting specialist. Here’s what to check:

Overflow during rain

During heavy rain, do you see water pouring over the front of the gutter, splashing onto decks or pooling beside the house? Overflow is the classic sign of a blockage or an undersized/down‑sloped section and needs attention quickly to protect cladding and foundations.

Sagging or uneven runs

Gutters should follow a gentle, consistent fall toward outlets. If sections dip, bow, or sit flat, water will pond and accelerate rust, seam failure and overflow. Look for loose brackets, pulled‑out screws, or detaching fascia.

Drips at joins and corners

Seams, mitres and stop‑ends are high‑stress points. Damp streaks, water marks on the fascia, or staining on the soffit beneath corners indicate sealant failure or corrosion at joints that need either resealing or replacement.

Rust, pitting or paint blistering

Any exposed metal will corrode faster, especially where water sits. Check for orange staining and bubbling paint or pin‑holes. Small patches can sometimes be treated; widespread pitting usually signals it’s time to replace sections.

Cracks, dents and hail damage

Impacts from ladders, branches and hail can crease the gutter profile or split thin corners. Even minor deformation can interrupt flow and trap debris. If the spouting profile is damaged expect possible blockages.

Persistent standing water

After 24 to 48 hours of dry weather, look for shiny puddles inside the gutter. Standing water means inadequate fall, a sag, or debris building a “dam.” It can create and speed up corrosion.

Debris build‑up and plant growth

Leaves, silt, moss and seedling “little gardens” inside the channel are more than cosmetic. Sometimes they stop water getting to the downpipes. If you need to clean than a couple of times a year, maybe you should consider leaf guard options that suit New Zealand conditions.

Blocked, loose or short downpipes

Downpipes should be securely connected to outlets, uncrimped, and sized for the catchment. Watch for leaks at every join. Ensure the final discharge sends water well away from the house, not onto paths where it can pond and re‑enter under doors.

Water stains, mould or musty smells

Inside or outside, discoloration on soffits, ceiling edges or top corners of walls often traces back to gutter leaks. A musty “damp” smell in eaves after rain is a red flag—don’t ignore it.

Fascia or bargeboard deterioration

Peeling paint, swollen timber and soft patches behind the gutter indicate long‑term moisture. Fix the source or you’ll be repainting and replacing fascia again soon.

Nails, screws or brackets on the ground

Fasteners sometimes work loose in strong winds. If you’re sweeping up screws or old spikes, a section is probably insecure. Re‑fixing with the right hangers restores alignment and fall.

Age and recurring call‑outs

If you’re patching the same section every winter, the gutter profile is obsolete, or leaks keep returning, replacement can be more economical than the next repair—especially if you’re planning exterior painting or a roof refresh anyway.

DIY fixes vs professional help

Simple clearing of leaves and silt is a safe DIY task when done from the ground with a hose attachment. Anything involving ladders, roof edges, live electrical wiring, or resealing/fall correction is best left to trained spouting / roofing specialists. 

Repair or replace? A quick rule of thumb

Repair makes sense when the gutter is generally sound, issues are localised (for example, one faulty joiner), and you’re not facing widespread rust or deformation.

Replace when there’s repeated leaking, pervasive corrosion/pitting, obvious mis‑fall across long runs, or a profile that no longer meets demand. 

Maintenance rhythm that actually works

Plan two clean‑outs per year once after autumn leaf‑drop and again in late spring plus a quick check after major storms. Trim back overhanging greenery and check that rainheads and leaf guards (if you have them) are clear. If it’s easy accessible and safe you should test flow with a hose from the highest point. Keep a small notebook or phone photos so you can track what’s getting worse and what’s holding steady.

How Clearwater Spouting helps

We’re specialists in spouting, downpipes and rainwater solutions, basically from spouting repairs and resealing to full system replacement and internal‑to‑external gutter conversions. We assess the roof catchment, gutter fall, outlet sizing and downpipe layout as one system, then recommend the most durable option for your home and budget. You will get a clear proposal,  before/after photos, and tidy, safe workmanship.

Don’t let minor gutter glitches become major repairs! Book your free on‑site assessment at 0800 RAINMAN with Clearwater Spouting today. We’ll find the cause, fix it properly, and keep water where it belongs – out and away from your home!

Quick reference checklist (save this)

□ Overflow during rain

□ Sagging or flat runs

□ Leaks at joins and corners

□ Rust, pitting or blistering paint

□ Dents, cracks or hail damage

□ Standing water after 24–48 hours

□ Heavy debris or plant growth

□ Blocked/loose/short downpipes

□ Stains, mould or musty smells

□ Fascia damage behind gutters

□ Loose fasteners on the ground

□ Recurring repairs or obsolete profile

Got ongoing issues and thinking about a bigger upgrade?If you have internal gutters and consider converting to an external system ask us about options and timing!